Sunday 29 December 2013

Workshop Lits

I hope you have had a wonderful Christmas & Father Christmas has been good to you.  How many of you had crafting goodies.  I did not receive any but was given money so guess what I will be purchasing because I have no way nearly enough. :)
 
It is that time again to give you the new time table for the workshops that will be taking place during January until May.  I hope you will find a workshop of interest to you.  The ladies who attend the workshops each week are wonderful, friendly ladies and are eager to share crafting knowledge with you.  We would all love to see new members attend.  If you wish to attend please just call on the above number or email me.  It is a great time to have some me time and go away with a completed project.  All materials are included.  All you need to bring along is a basic tool kit and for pro-markers, your pens if you have any. Don't worry if you don't own any. I have nearly all the colours.
 
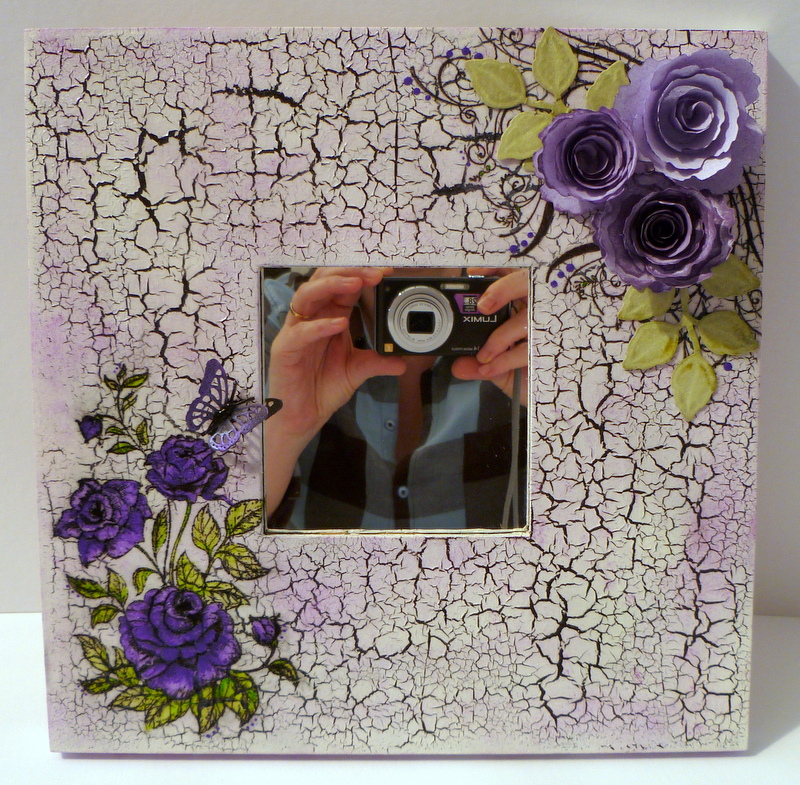
As well as the regular workshops I run an all day workshop using either Jo Sonja Acrylic paints for home décor or using Eureka Craft templates to make 3 dimensional cards or gift items. If you would like to attend any of these workshops I would advise you book your place early as there is only 5 places available.  Pictures of the cards and workshops can be found on the website or blog. (For further information on the Jo Sonja Paints please have a look at the website.)

I also have some exciting news!!  I will be joining forces with Lynn Courtney (Formerly owner of Flutterby Crafts) to run craft workshops regularly though out the year at different locations around the country. The workshops will include using Jo Sonja Acrylic Paints and other different mediums.  There will also be a pop up shop.  The first workshop is at the end of March 2014 at the 1st Scouts Hut in Twyford, Berkshire.  In the meantime, if you know of any locations that you know of that is ideal to run these workshops or you would like it to happen near you, then we will be please to hear from you.  Further details will be sent to you very soon so please watch this space!!!  

I hope I can look forward to seeing some of you at the workshops. In the meantime Happy New Year. I hope it is a happy & healthy one.


Tuesday 10 September 2013

Butterfly in flight

I am on a role now so I thought I would also share with you the card we made during the last rubber stamping workshop.
 
Above are some of the ladies proudly showing their finished cards. Although they used the same mediums and stamps they all came out slightly different.

 
To make the above card, pan pastels were used to create the background.  This was achieved my dusting some of the powder onto a mat and then add a little bit of water. Mix the water with the pan pastels and then move a piece of white card that has been cut to size around onto the colour.  Once you have covered the card, dry using a heat gun.  When dry choose a different colour of the pan pastels and again add water.  This time move a bottle top within the colour (Milk bottle top is good) and stamp onto your coloured card.  Dry with a heat gun. When waiting for the card to be completely dry, stamp your desired images and colour.  I have used stamps from Chocolate Baroque and coloured using Prisma pencils.  By this time you should be able to stamp onto your decorated background and then place onto a card.  I finished the images by adding glitter glue to add a bit of bling.
 
If you have ago on the above I would love to know how you got on.
 
Jeanette x 

Wedding Candle

Hi everyone.  Again sorry for not posting for over a month. I really do need to give myself a kick and post regularly but in the mean time I hope you are all well and making the most of what is left of the sunshine.  The cold weather is definitely on the way :( It does mean more time inside crafting!

I wanted to share with you a candle I decorated for my Mother-in-Law's friend.  Her friend wanted one decorated to give to her son for his wedding day and to have their wedding colours used.  The heart on the candle was cut  using my silhouette and then glittered it. The wedding couple is a Lilli of the Valley stamp and was coloured using watercolour pencils.  The heart on top of the box was an MDF heart, which within the next couple of days will be available to buy for you to decorate on my website, www.craftyneeds.com.and   I decorated the heart with Jo Sonia paints, stencils and flowers cut out using my die cutting machine.  The box was made using 350 gsm card and acetate was used for the windows. 

Jeanette x

Thursday 1 August 2013

Elizabeth Bennett


It is a beautiful day again and I know I have been sat inside crafting and on the laptop, but it has to be done :)

I wanted to show you this sample I have made using the Indigo Blu rubber stamps, 'Elizabeth Bennett'. I love this image and have used here several times.  This example I used distress inks to colour the background and then went over the top of a stencil with a darker colour.  I coloured the main image with the same inks and distressed the edged before layering up onto dark blue card.  The lace added around the card was again died with distress inks. The card was finished with flowers die cut swirls and lace.

 
Hope you like it. Enjoy the sunshine Jeanette :)


Tuesday 30 July 2013

Newsletter

Hi Everyone.  I have finally got round to adding my latest newsletter updating everyone with what I and the ladies who attend my workshops have been up to.  The newsletter below is the shorter version. If you would like to see the complete newsletter, click on the newsletter link. This will take you to my website. The newsletter is on the news page.

NEWSLETTER
I will start with what we have been doing in the Rubber stamping Workshops,
held on the 2nd Friday and Saturday of each month.
We have covered many different mediums and techniques. Below are some
 examples from the last few workshops.


These cards were made by some of the girls using Indigo Blu Rubber Stamps
and distress inks to make the background. 
Watercolour pencils were used to colour the image.


This card was again using Indigo Blu Rubber Stamps. The mediums
used were clear embossing powder, distress inks and alcohol inks.
The die cut shapes were using spellbinder dies.
This image is not particularly clear but hope you can see
enough for the overall design.


Using Cosmic Shimmer Fibres and film we created this butterfly card. 
We first cut two pieces of film and placed some fibre in-between. 
This was then ironed together and put though the die cutting machine
using a large butterfly die.  The body was covered in Stix 2 Seed Bee'ds. 
The background was coloured using Pan Pastels and embossing powders
in the bottom corners.  The flowers (Chocolate Baroque)  was stamped
using brown memento.  Before all these techniques were used the
background was embossed using a plastic template.

  
Back in the year I put together this project for the girls using the,
yes you guessed it Indigo Blu stamps.  This beautiful stamp was perfect
on this exploding box and made a lovely gift.  A candle was decorated
to go into the middle of the box.  This workshop was a little more work
than usual therefore was run over the rubber stamping and
pro-marker workshop.  The images were coloured using pro-markers.
 
Our most recent workshop, we made a card with a slight difference. 
 
The front of the card we stamped the latest Indigo Blu stamp twice
 and a butterfly from Chocolate Baroque twice.

We used prisma pencils to colour the images in. The background was
again an Indigo Blu Stamp but you knew I was going to say that :)
 Inside the card a box was made so a gift can be placed inside.
The card was tied together with ribbon.


Every couple of months I hold all day workshop to cover the more
involved projects.  The last 3 workshops we have used
Jo Sonia paints and crackle mediums to decorate a mirror,
tissue box cover and a clock. The Jo Sonia Acrylic Paints are second to none.
They give wonderful results and the pigment in these paints are far
superior to most other makes.   The price for the individual paints
are inline with most other paints on the market. I am confident
you will not be disappointed if you decide to purchase this make of
acrylic paints.  I will have these paints listed on my website for you to
purchase but in the mean time if you are interested in finding out
more or to purchase you can email me via my website www.craftyneeds.com.
 
Below are the photographs of the last 3 workshops.


The clock and tissue box cover were made from 6mm MDF.
These are available to purchase from my website www.craftyneeds.com.
 
I have also had some time recently playing with the Jo Sonia Paints
myself using the various different mediums and texture paste. 
I totally lost myself and before I knew it my Husband was walking
back though the door after being at work all day.
I hope you like what I achieved.


As well as the above we also enjoyed making an A4 book to house
information on different mediums and room for notes etc.
The front image was a digital image and was coloured
using pro-markers. The book was put together with the bind it all
and the papers used to decorate were Bo Bunny papers.


I hope you have enjoyed reading the above. I
f you would like to see all of the newsletter you can access this
though my website www.craftyneeds.com
 
Happy Crafting Jeanette :)


www.craftyneeds.com
www.facebook.com/craftyneeds ~ www.crafty-needs.blogspot.com ~ www.eurekacraftdesigns.blogspot.com
07795210789


www.craftyneeds.com
www.facebook.com/craftyneeds ~ www.crafty-needs.blogspot.com ~ www.eurekacraftdesigns.blogspot.com
07795210789